After fitting each leg to its respective joint it’s time to join the two halves of the table top. The edges were hand-planed to a tight fit and then clamped as shown. I don’t use dowels or biscuits for alignment or strength – when the joint is well-fitted and glued with a moderate amount of glue there is very little “skating” as clamping pressure is applied and it is quite easy to align ends and surfaces. Most folks are aware that a properly glued joint is stronger than the wood so reinforcing the joint for added strength is not very helpful — if the joint is stressed by a heavy weight or shock, the top would likely crack somewhere other than the joint.
 I used the over/under approach in clamping up the top in order to equalize the clamping pressure since the stock was so thick.
Next step was to plane the top and then saw the tapers on the legs and plane them as well.
 Besides the obvious taper of the leg witnessed from the end view, the legs are also tapered by about 3/16″, getting thinner at the bottom. It’s hard to notice that it is there, but rather noticeable if it is not done: though this is by no means a svelte table, some little touches help avoid a boxy look.
I pre-finished the underside of the table top and the insides and sides of the legs to avoid having to finish inside corners once the legs are glued on. I used an oil/varnish mixture of 3 part varnish to one part tung oil to one part solvent. I’ve been really pleased with the Sutherland and Welles finishes and solvent which are botanical based and have very low toxicity according to the Material Safety Data Sheets (MSDS). It is very quick drying (about 2 hours in ideal conditions). I use 4 coats wiped on allowed to soak in briefly and then wiped off. I use paper towels for this and then burn the towels in my woodstove or allow them to harden in a metal bucket placed outdoors.
 After the finish was applied, the legs were tapped into place with some Titebond glue applied.
Later, the end-grain was cleaned up with a hand-plane then finish was applied to the top and outside of the legs.
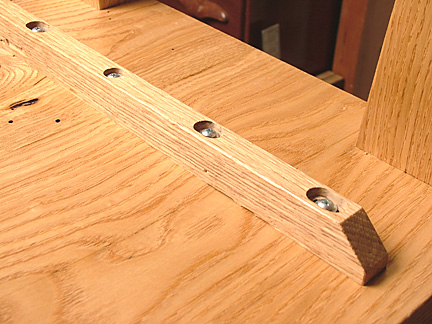
Finally, I made some battens to screw on to the bottom to stabilize
the table-top from any eventual warping. Slots in the battens allow for cross-grain movement of the top.
And then, it was done.
Until next time,
df


