Workshops: Band-sawn Veneers

I spent the day this past Friday with Mr. Chuck Howerton from over by Knoxville, TN delving into the topic of Band-sawn Veneers.  That’s using the band-saw to to cut your own veneers from solid timber. Chuck is smoothing a back-panel he put together from veneers he cut from a board of curly maple earlier in the day.

We started by chatting about design aspects of using veneers, cores and glues and the use of internal and external edge gluings.  The we spent some time discussing tuning up band-saws and choice of blades. From there, I demonstrated setting up and sawing veneers and then Chuck got in and sawed some of his own. It was challenging!  His panel is made from cut down veneers, but we did not want to cross-cut his plank so he was sawing veneers that were 7″ wide and 40″ long in hard maple.  That is no easy task  when the goal is to get consecutive slices of wood that are a uniform 3/32″ thick, but he was up to the challenge. Then came edge gluing the veneers, preparing the panels for pressing and gluing the veneers to the core with  a vacuum press.  And finally, as pictured, cleaning up the panel.

I was able to support Chuck’s instruction with a veneering project I was working on myself — replacing a bathroom vanity in the “shop” bathroom. It has a veneered side and doors as well as the top, all done in pine and cherry.  Here are some of the pine veneers waiting to be edge-joined.

And a door panel with an edge gluing applied and leveled prior to veneering it.

Until next time
df

Posted in Private Instruction | 2 Comments

Making and Mastering Wood Planes — the Movie: Sneak Preview

I have in hand a test copy of the cover art and DVDs  for the video version of Making and Mastering Wood Planes:

The artwork looks fine, so I’m in the process of running through the entire 2 DVDs and making sure everything has copied soundly before giving the go-ahead for duplication to begin.  With luck, it should be available for distribution next week!  Here’s the trailer if you haven’t come across it on my web site yet:

Coming up:  more on guitar number 26

Until next time
df

Posted in Making and Mastering Wood Planes Book-Video | Leave a comment

Shop Upgrade: SawStop Table Saw

In the last few years more and more folks have been stopping by to get one-on-one instruction and work on a project at my shop. While I make every effort to keep a safe environment, the thought of someone (or myself!) getting injured has always been a worry, and that great flesh-eater, the table saw, has always been my greatest concern. I’m breathing a lot easier now with the recent purchase and installation of a SawStop tablesaw. As most woodworkers are probably aware from Sawstop’s infamous hotdog video, the machine is capable of detecting contact with skin and instantly stops and retracts the blade when it does so:

And, like most people, I find this demonstration very impressive! Here’s the saw in its new home:

I dropped a Bench Dog router lift into the extension table and I am also impressed with this device:

It’s built like a tank, makes very precise height adjustments from above the table, and the router collet can be brought up above the table surface as well, making for very convenient bit changes.

I added on a good sized drop-down out-feed table to the saw. This design owes a lot to a post on youtube. I also made a standard table saw cross-cut sled — an indispensable table saw accessory

Here’s the out-feed table set for use.  This makes one-man, large panel handling imagineable


And here’s a little detail of the drop-down leg:


Besides offering unmatched safety the SawStop is just a nicely made table saw.  I regard it as  a healthy step up in quality from the Unisaw that it replaces in my shop. Of course, it offers no more protection than a conventional table saw from kick-backs, but your chances of walking away intact from an encounter with the blade of a SawStop are much improved.

Update: the video version of “Making and Mastering Wood Planes” is at the duplicator’s facility. I’ll receive a review copy latter in the week and if all is good I should have the first copies available for shipment the following week. Everything was going on schedule until we got to the review stage of the post-production process. It’s just very time-consuming to review and tweak over 4-1/2 hours of video!

Until next time!
df

Posted in Shop Stuff | 15 Comments

Making and Mastering Wood Planes — The Movie UPDATE

Making and Mastering Wood Planes” in HD video format is just about ready for release!  The production company, Agricola Media has done a masterful job of  putting the video together.  It’s running about 4 hours and 40 minutes on 2 DVDs and presents the topic with great clarity.  The masters are being prepared for reproduction and the artwork for the DVD case and discs is all but done. Turnaround at the duplicator is pretty quick so I’m hoping to see it available by early in March. That’s only one month later than I originally hoped for, which really isn’t too bad for the first time around.  Drop me an e-mail if you wish to know as soon as it’s out, but of course, I’ll be mentioning it here as well.

Until next time,

df

Posted in Making and Mastering Wood Planes Book-Video | Leave a comment

Horsehair and Wood: Re-hairing a Violin Bow

The idea for producing musical sounds using a bow fitted with horsehair is thought to go back at least a thousand years to the nomadic horse cultures of Central Asia, while the modern violin bow was perfected in the mid-to-late 1700’s. With this rich history, bows are a fascinating mix of engineering, material, and refined craftsmanship and an essential element in bringing any great violin to life.  And why this interest in bows? With two dedicated teenage violinists in the house, bows are just a part of my life. From replacing or repairing the protective bone tips, to re-gripping the leather holds, to regular re-hairing, I’ve gotten to know and appreciate the intricate beauty and engineering of this amazing bit of of woodworking.  Anyhow, I recently re-haired both girls bows and thought you might enjoy a peek into what this is about.

Update 10/3/2013: It should be said that bow work is rather tricky and quite delicate and if you are interested in trying this yourself, be certain your bow is a cheap one — you could easily suffer a complete fail until you have gained experience! (Thanks to Andrew Bellis’ comment for pushing this point). The following is not meant as a tutorial, simply a chronicle of some of the work that I do.

Update 3/26/202o: I wrote this article after one year of experience rehairing bows. It is still not something I do a lot of, but I have gotten better at it 7 years later and changed how I do a couple of things:

  1. Start at the frog end and finish the job at that end before beginning at the tip. Going this way allows me to fine tune the hair lengths more accurately and now it is rare to have even one loose hair, nor is flaming the hairs ever needed to tighten hairs up.
  2. I use a drop or two of water thin super glue applied with a micro-pipette to secure the thread, knots and hairs instead of rosin — more effective and neater.

Well, here’s a bow  and a very handy fixture for securely holding the bow while it’s being worked on.   It’s made to gently clamp the bow at the tip and frog end (the ebony grip is called the frog) and accommodate various length bows.
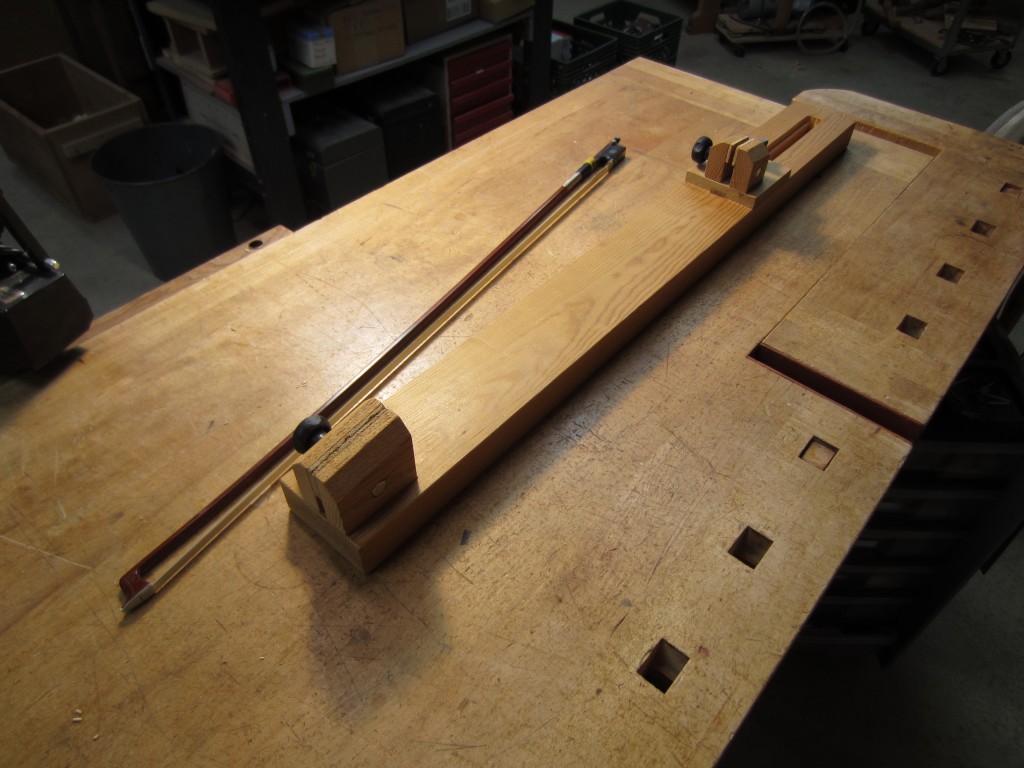
After inspecting the bow, I remove the frog from the stick and fold back the hair at the tip end in order to remove the small wooden plug that secures the hair to the bow tip.  The plug should not be glued in. It’s unique compound wedged shape allows it to lock in place due to the pulling action of the hair. Sometimes, however, it takes a bit of digging to remove the plug.  If it stays intact then I may reuse it.
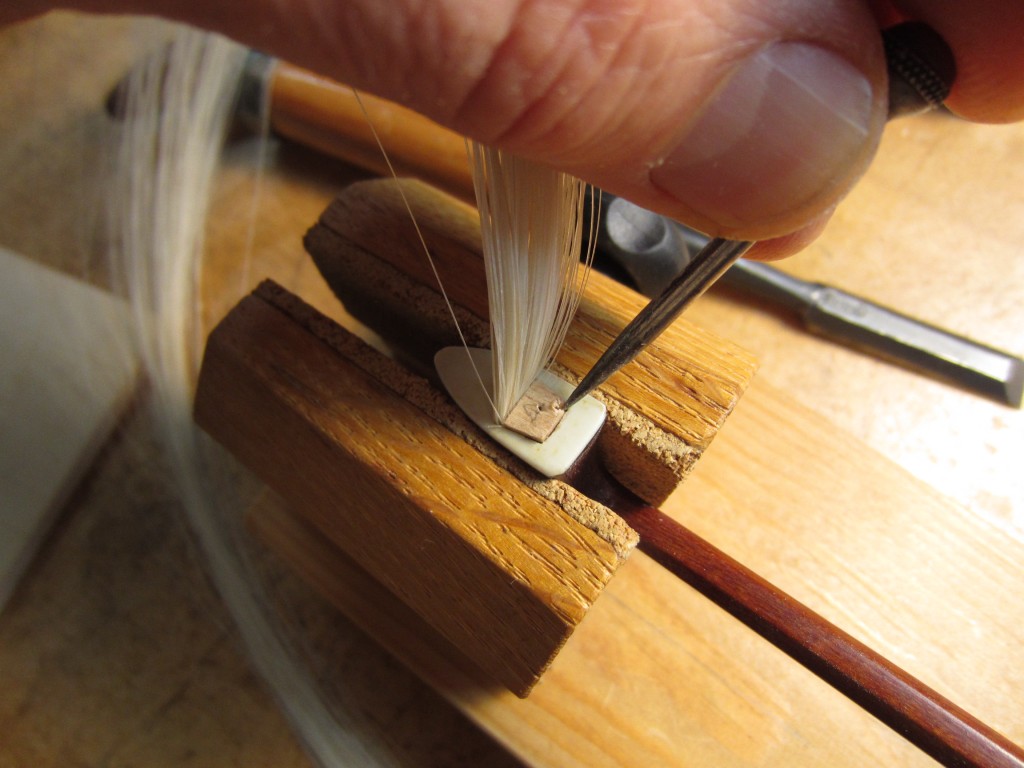
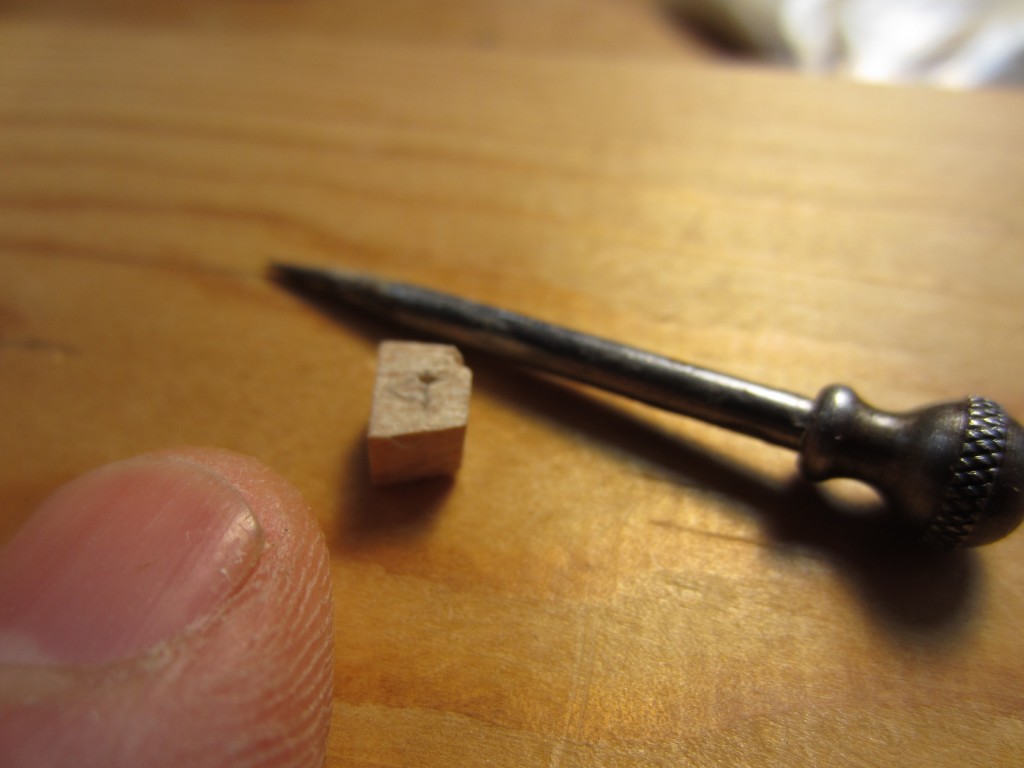
The plug is quite small as you can appreciate in this picture!
Once the plug is removed the bundled hairs are pulled out of the mortise.  Now it is time to remove the old hairs from the frog.
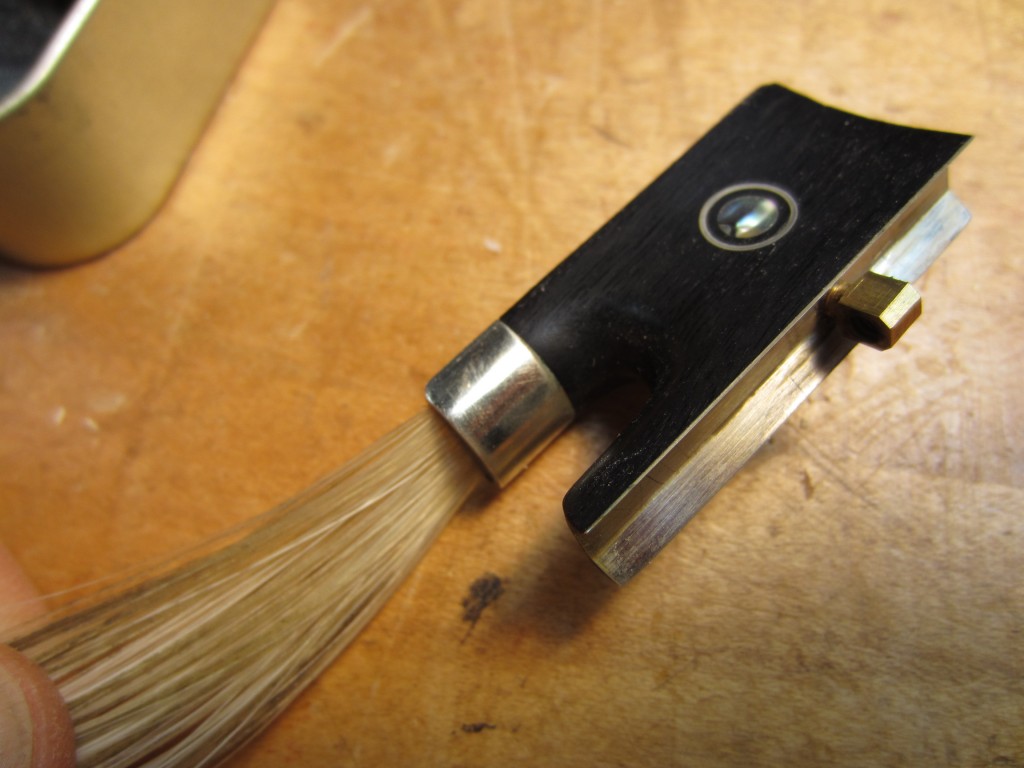
The metal ferrule is a tight fit and needs to be pulled off carefully. I use a piece of rubber and a small vise.
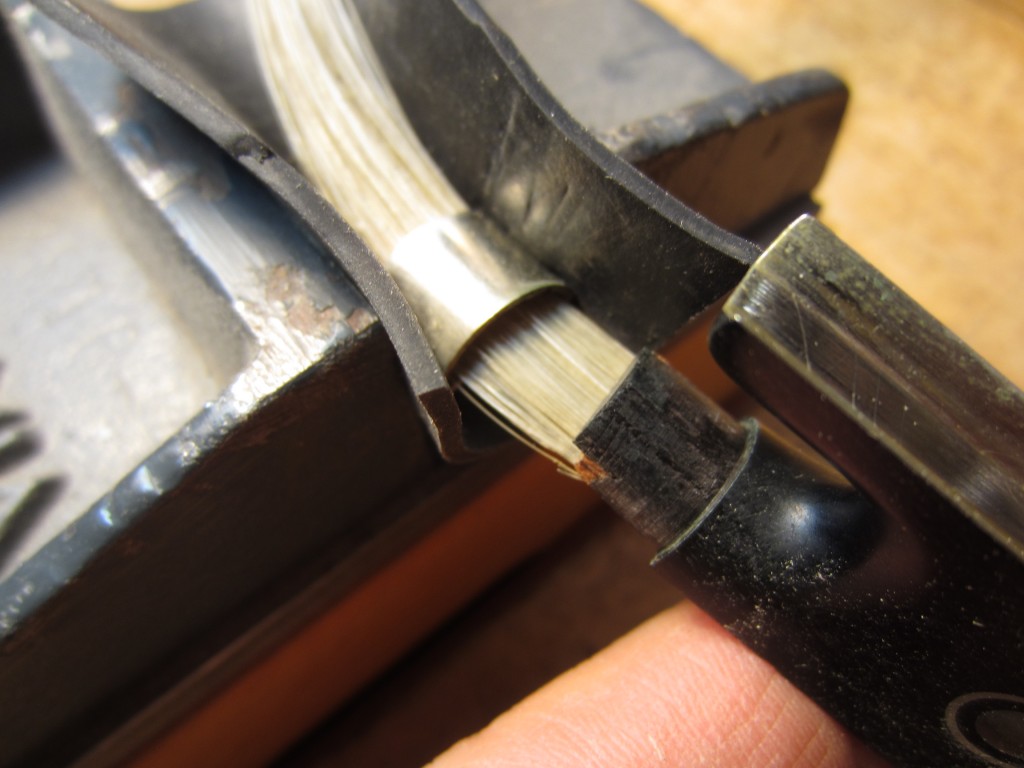
 

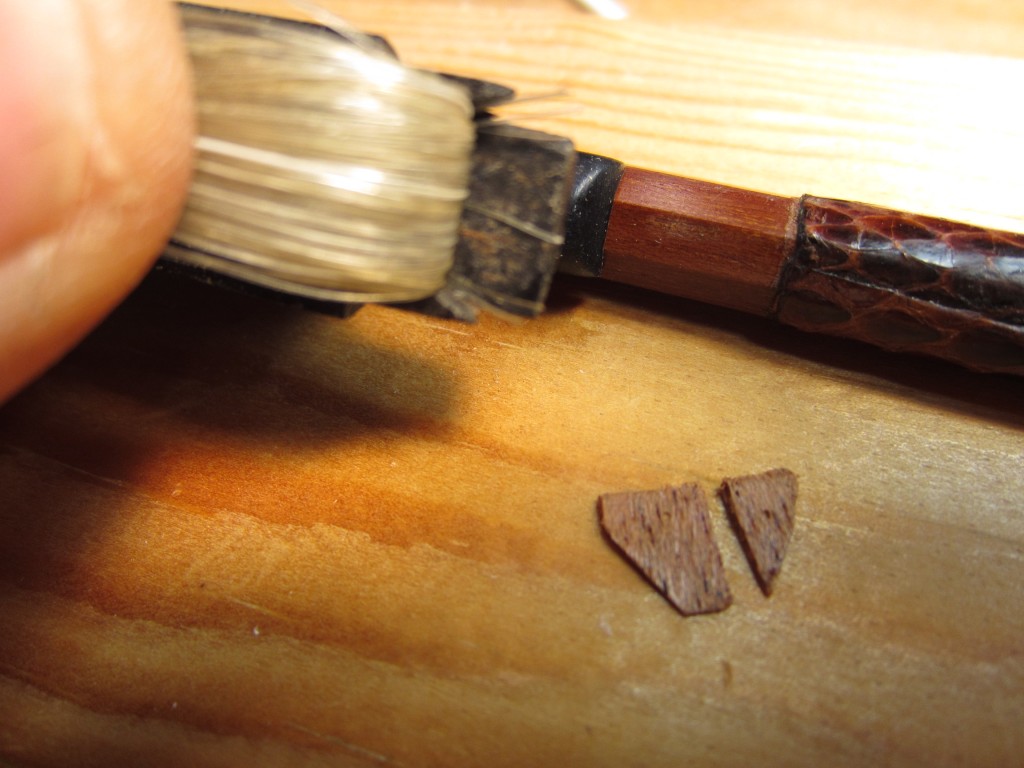
The small triangle of wood is called the spreader — it serves to do just that — spread the hairs into an even band.  A drop of glue holds it in place and as a result they often get ruined during removal. I always replace these anyhow to ensure a proper fit with the new bundle of hair.
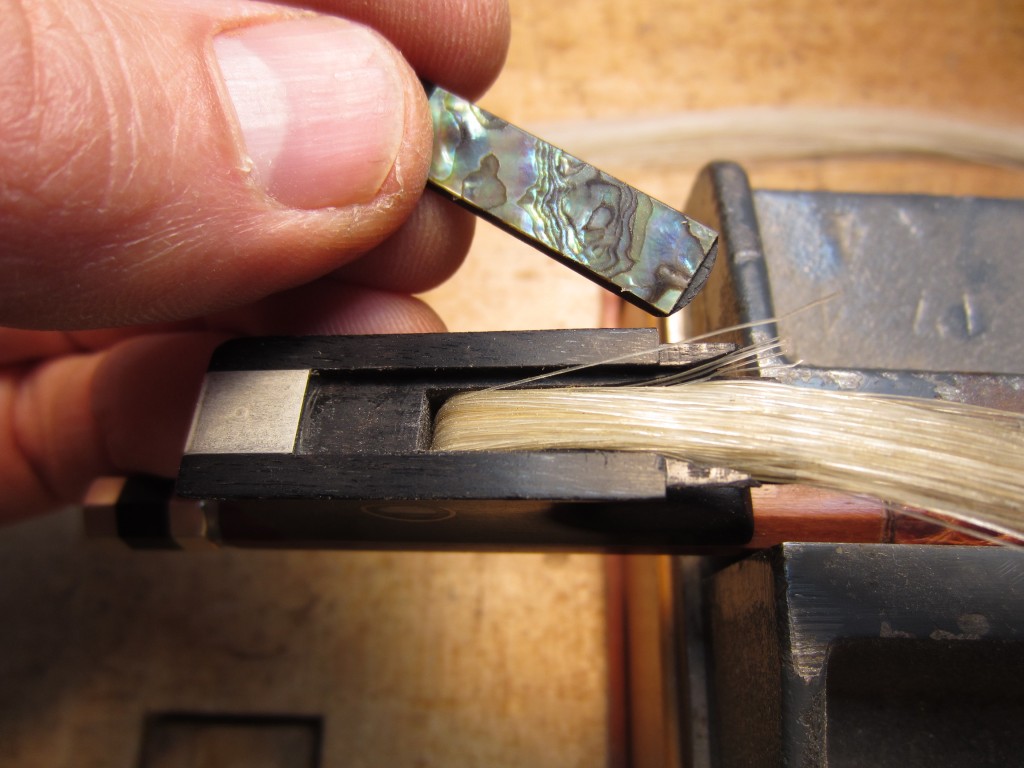
Next the abalone slide is removed.  It has angled edges that fit into the channel creating  a dovetailed way. These also can be recalcitrant due to tight fits and rosin buildups!
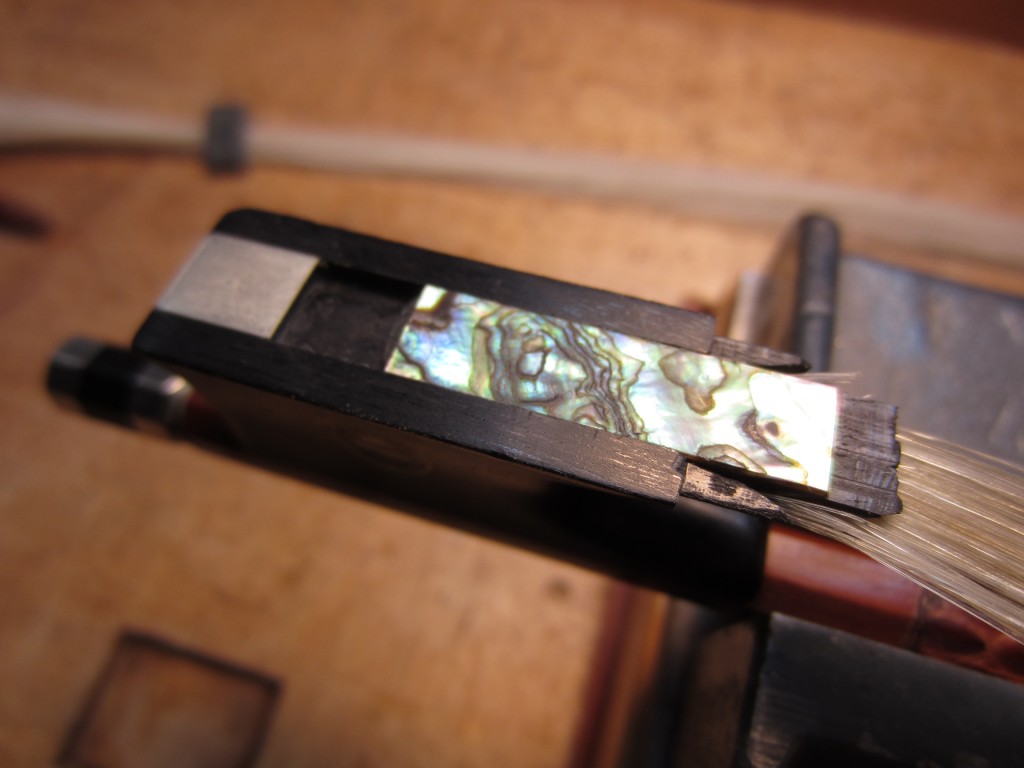
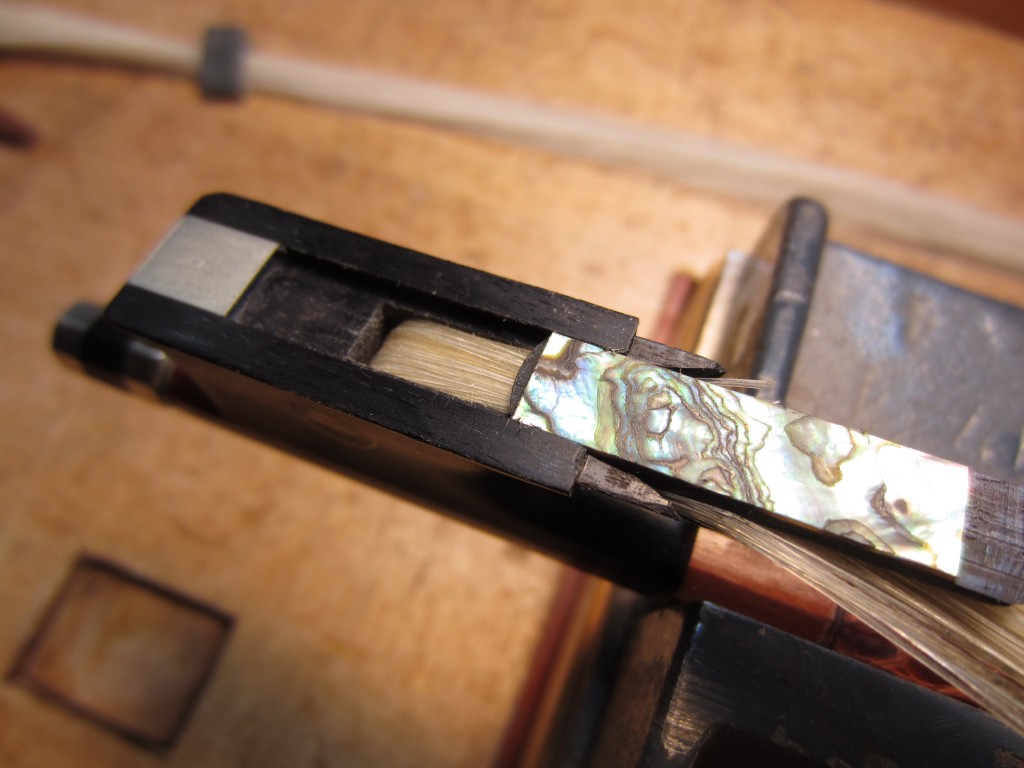
 

Fold back the hairs and the frog-end plug can be seen and then removed.
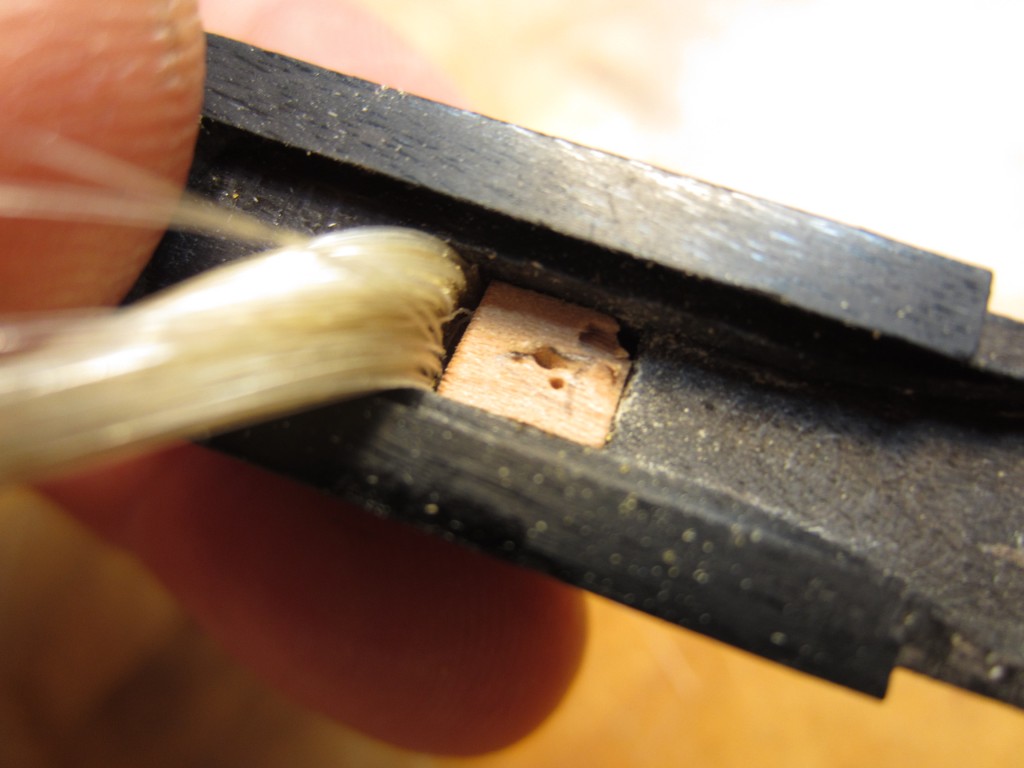
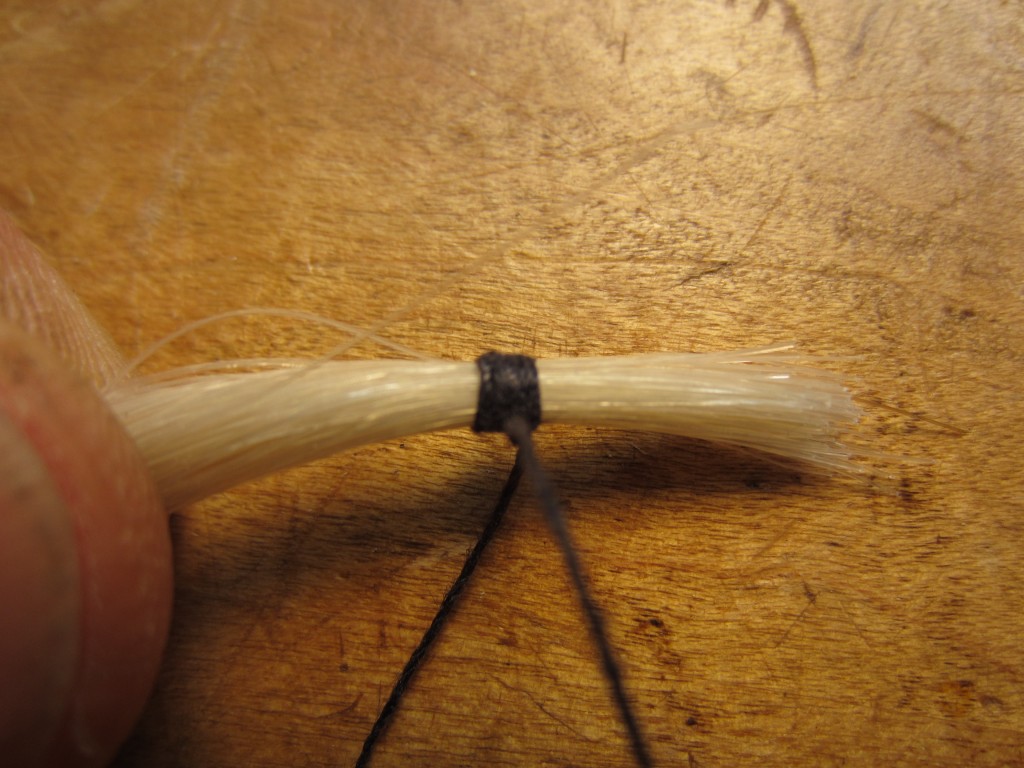
The frog is carefully cleaned, metal parts polished, and the channels for the slide are lubricated with graphite (pencil). After selecting and measuring a new hank of hair I tie the end off tightly with very strong thread. I use three clove hitches — a self binding knot – finished off with a reef knot.
 

The end is then dipped in powdered rosin.
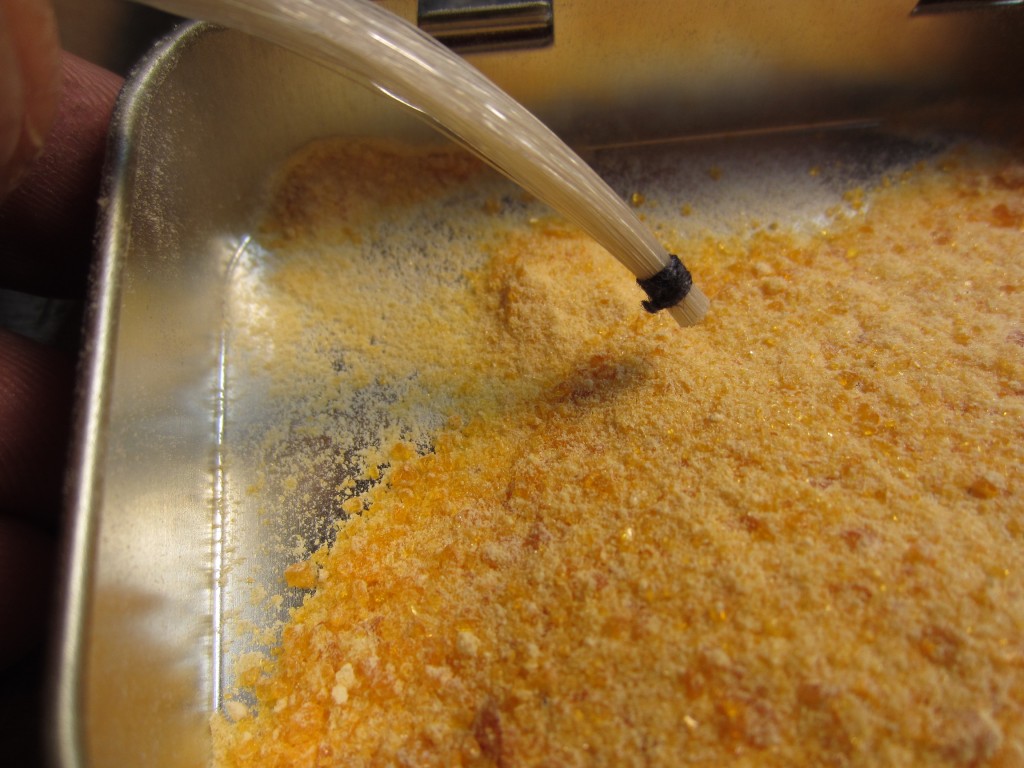
Then the rosin is melted into the hair, using an alcohol lamp, while the heat also serves to swell the hair ends, locking them firmly in place.  All of these efforts are taken to prevent hairs from pulling out while the bow is in use.

You can start attaching the hair at either end, but I prefer to begin at the tip.  Insert the hair so the knot is settled at the bottom of the mortise and then takes a bend to come up the back wall.
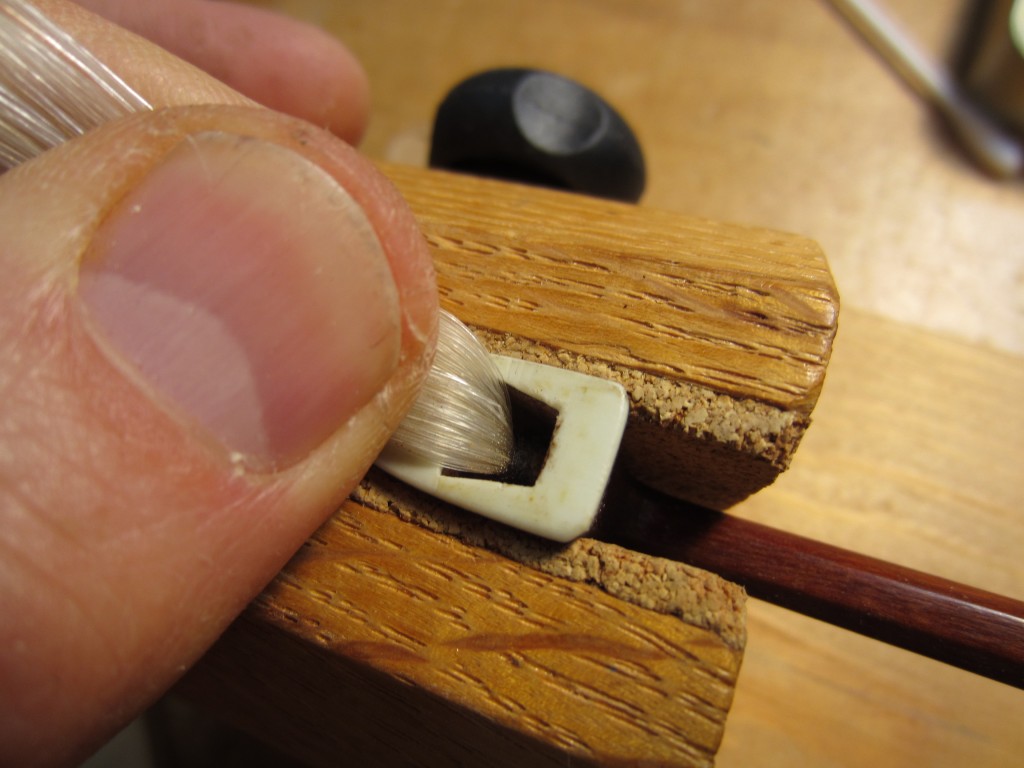
Then insert the plug to capture the hair bundle.  I reused the old one which was  made of hard maple and still seemed serviceable despite the small chip in the corner. I always give firm pressure on the hank of hair at this point, simulating use, to be sure that the plug is working properly and will hold the hair in place.
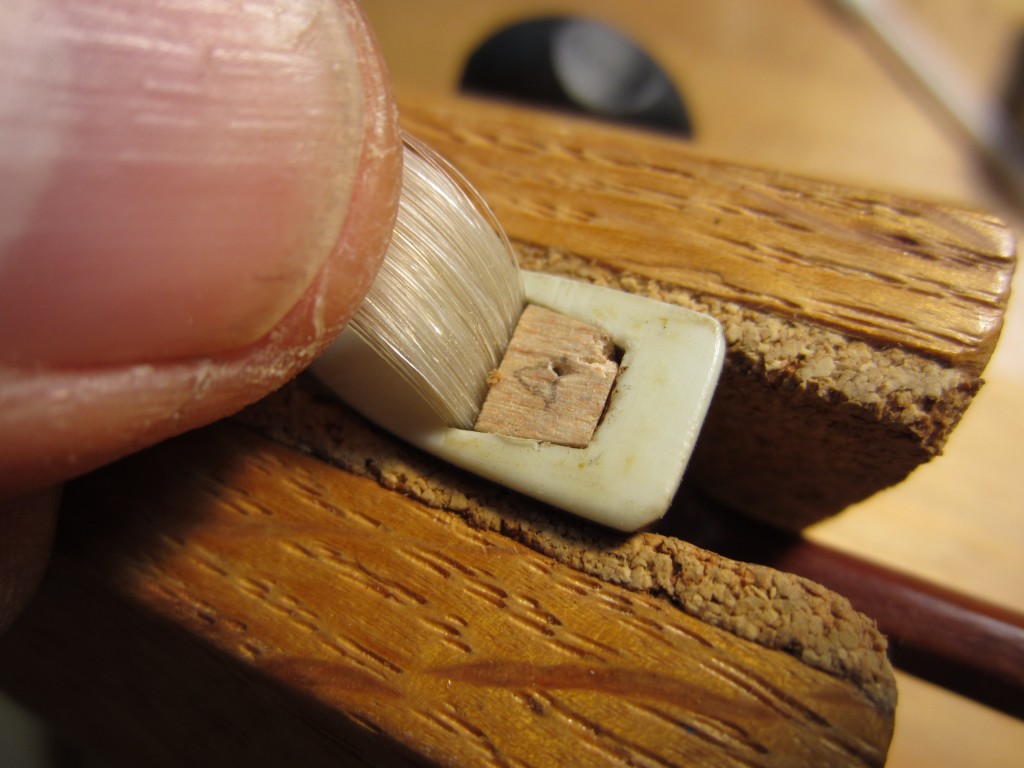
After a bit of preliminary combing to straighten and spread the hairs evenly, I use a rubber band to pull the hairs down tightly at the tip.
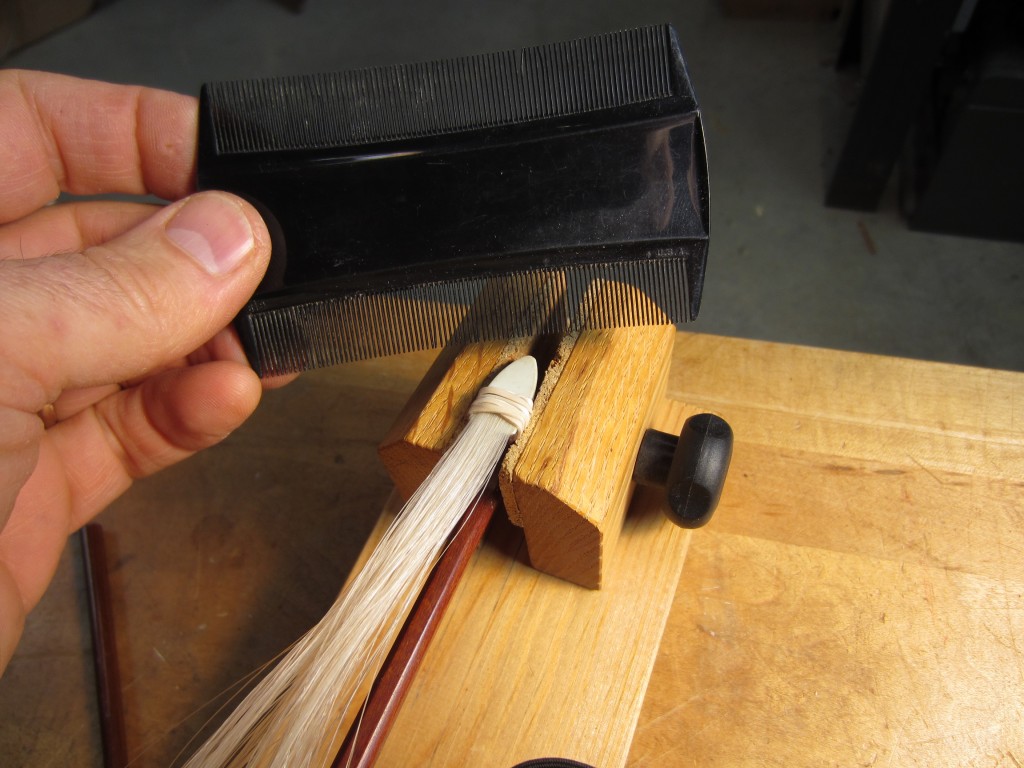
Next, I wet the hairs, comb and tension them and tie off the frog end. Now is the time to thread the ferrule onto the hank. Slide it up out of the way.  Then the plug is inserted to capture the hank in the frog.

The frog is installed on the stick. The abalone slide is slipped into place and the ferrule is put back on — it goes on easily without the pressure of the spreader clamping it. Here is some mahogany that has been shaped for a spreader. I insert it as is and mark and score it a little oversize for length.
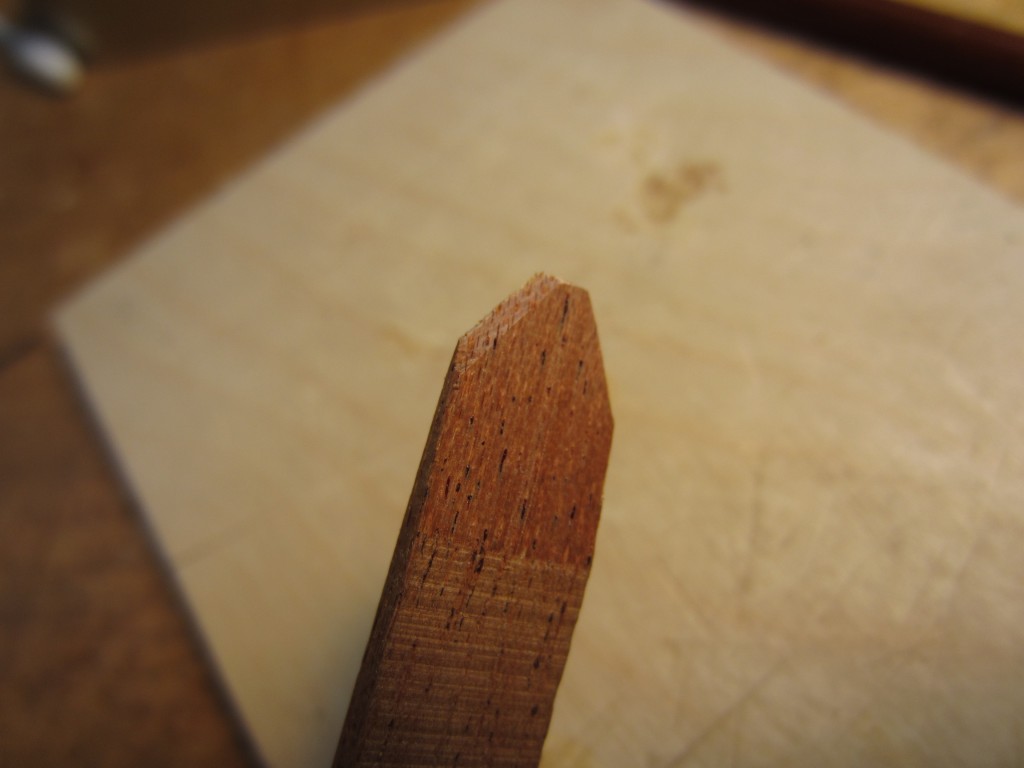
Finally, a dot of glue goes on the tip that will be against the ebony of the frog. the spreader is inserted into the ferrule, separated at the score mark and the hairs carefully fanned out and evenly distributed.  Then the spreader is pushed all the way home.

It’s a good job if the bow hairs all tighten up evenly when the bow is tensioned and all the hairs are properly aligned.

Until next time!

dF

Posted in Violins General | 114 Comments

Guitar 26: 5th Installment

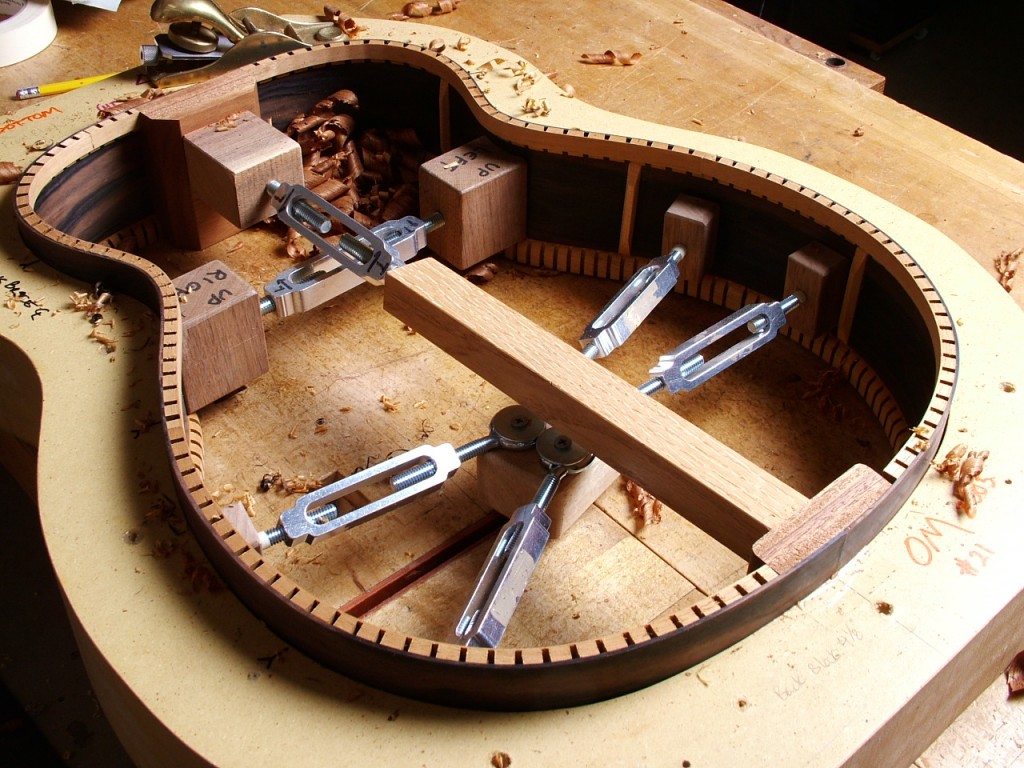
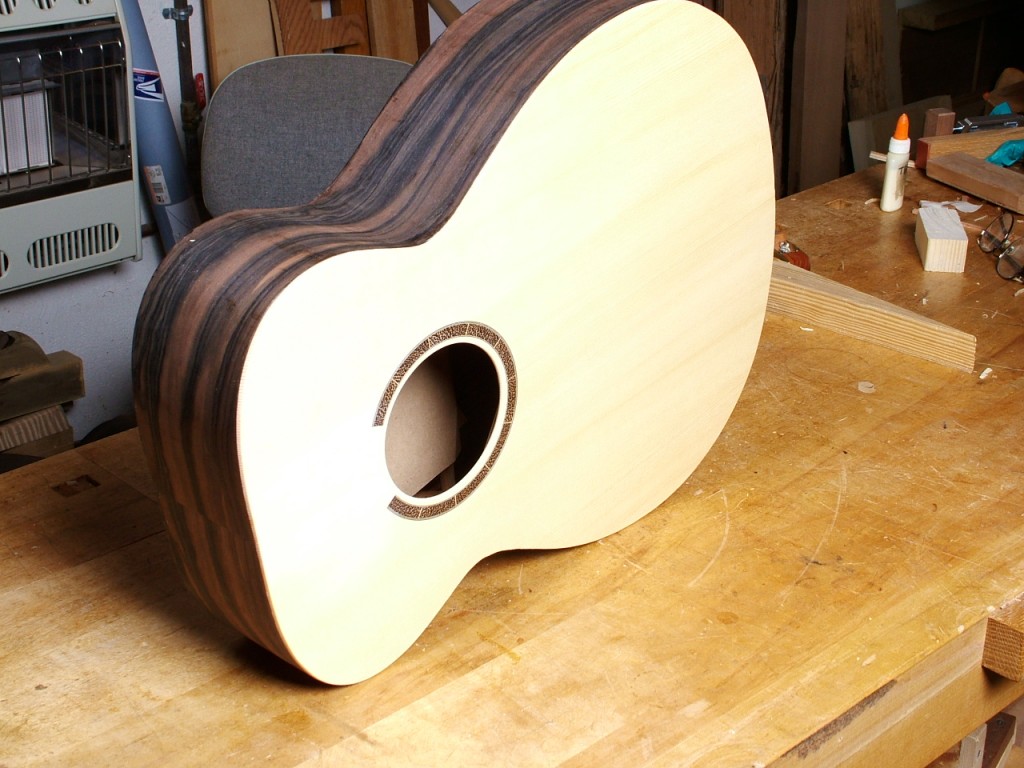
Happy New Year to  you!   Well, it’s back to guitar work and time to get the back and top glued to the sides. I stabilized the sides in the form with turnbuckle spreaders while planing the linings flush to the sides and fitting the heel and tail blocks to the back and top.

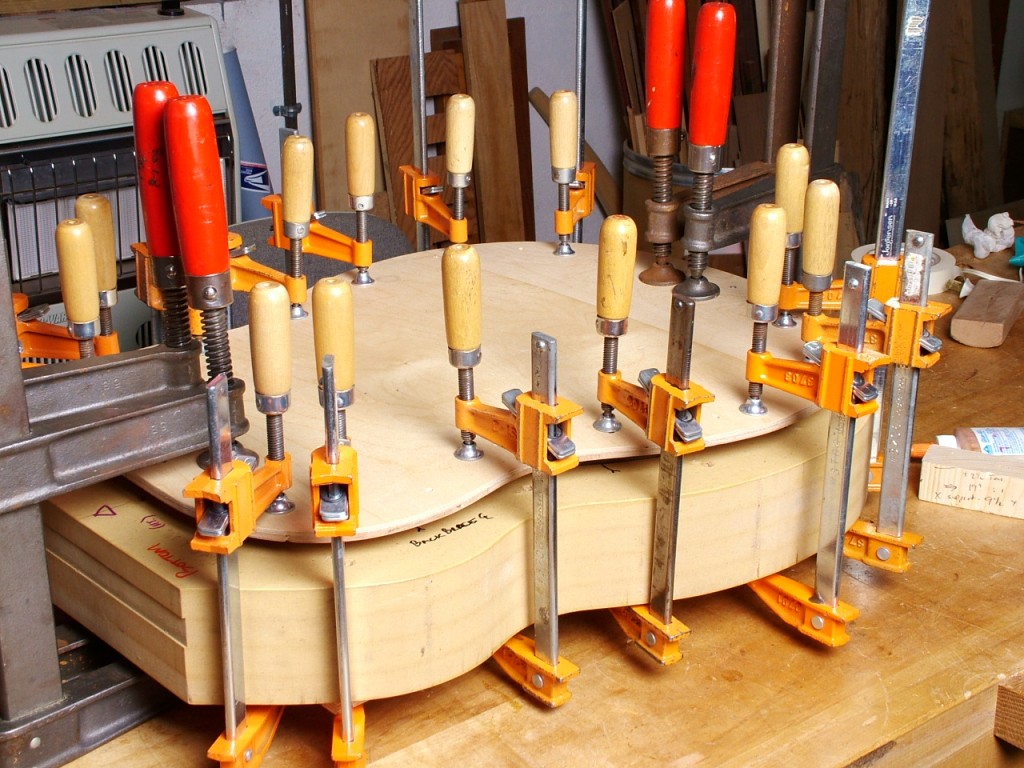
An 1/8th inch thick plywood caul rimmed with thicker material provides flexibility, clearance for the top and back arching, and stiffness for clamping.

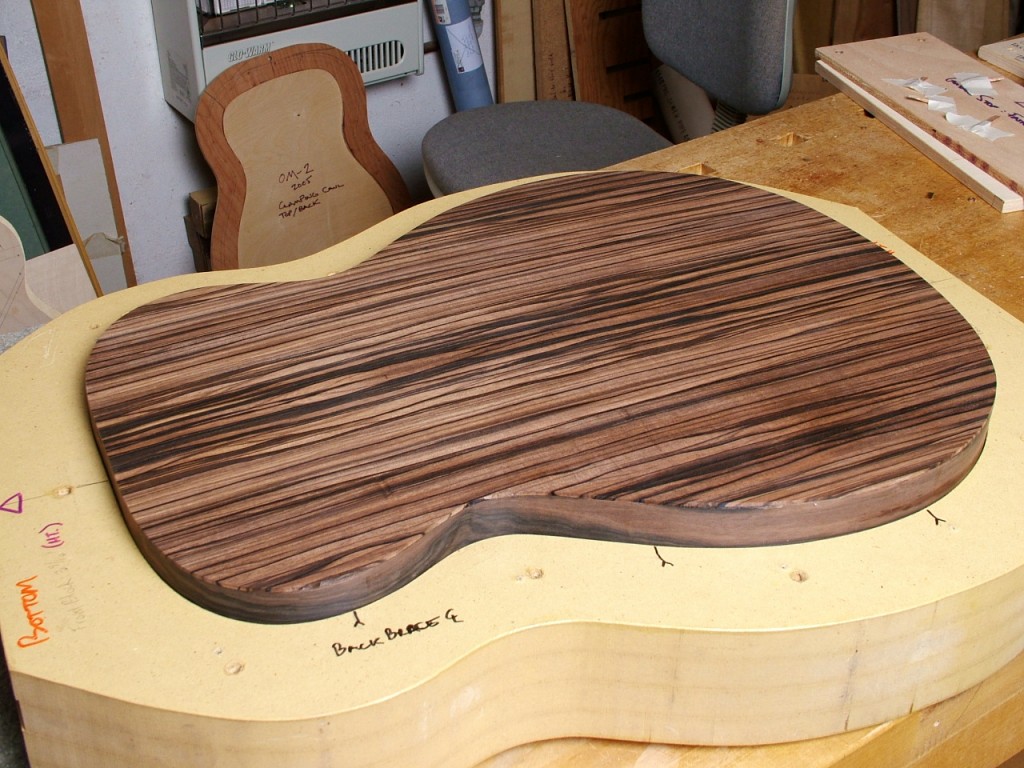
The back spends a couple of hours in the clamps, then the top is glued on in similar fashion (the clamping caul is visible in the background:

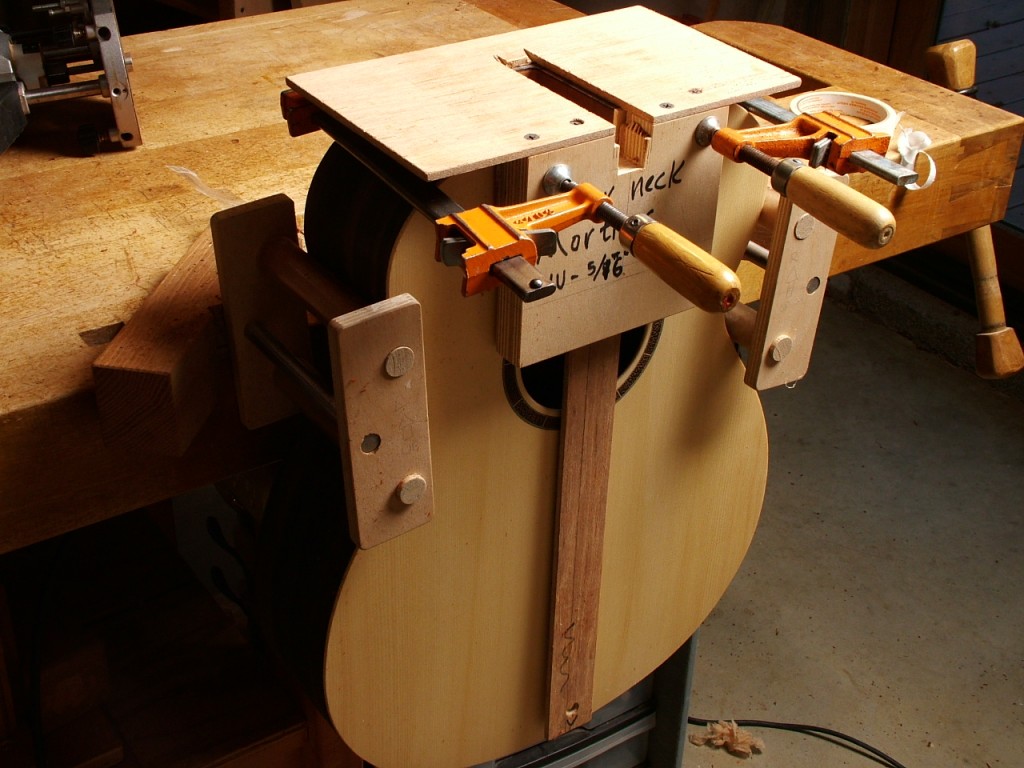
I use this simple jig to rout for the neck mortise. The plywood extension assures that the joint will be in alignment with the centerline of the guitar.

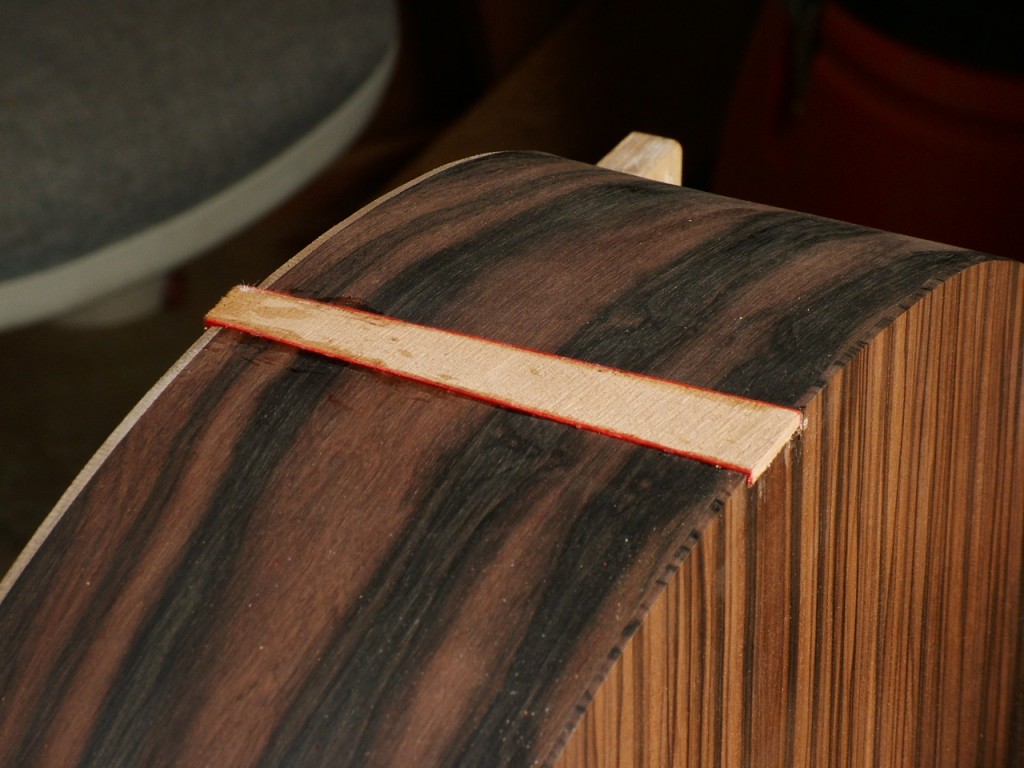
Here’s the tail inlay. 

Until next time.
df

Posted in Guitars | Leave a comment

Movie Box – the sequel

The box does not hold movies, the originals, as mentioned in the last post, were commissioned for the 2007 movie Nights in Rodanthe where they held keepsakes and love letters.  This box was commissioned by a very thoughtful guy for his wife for Christmas.  They were watching the film together and at the end she commented that she didn’t know about the movie (sorry movie people) but she really liked the boxes! Well, he tracked me down, as people sometimes do, and here we are. After rough milling the stock I went to hand planing the sides to finished dimension:

Next comes the shooting board to square up the ends, trims the pieces to the same lengths and polish the end-grain, which will make my dove-tailing easier going. After many years of putting it off, I finally made a purpose-built shooting board plane a little while ago and I’m glad I did.  The shape is comfortable for side oriented planing and the sole of the plane is squared to the down side:
So it’s on to laying out the dovetails.  Done free-hand we can approach the craft with a little more freedom and intuition and leave the squares and rulers and layout aids aside for awhile. In this instance I begin with the pin halves of the joint and then use them as the templates for the mating tails. I sketched out my layout on the stock and then made my cuts.:

Because of the curved, irregular and somewhat delicate outer surface of the end pieces,  I removed most of the waste by routing free-hand and then followed up with a guide block to do the final trimming, rather than chopping out all the waste with a chisel and mallet:


After getting the pins all squared up and the way I want them I trace around the pins to transfer the marks to the mating sides. Then I add the parallel square lines and mark the waste side of the lines:

Saw to the line. If there’s wood on the waste side of the line I’ll have to pare that away, if I take any of the line that’s a gap.

After removing the waste, these little chamfering details help the joint self-register and go together much easier during glue-up. 

Here’s the first corner dry-fit:


Onto the rest of the corners and then box is completely dry fit:

I band-sawed the curve of the lid then planed it to smooth and fare the curve:

I fit the lid to the box before the box is glued, as often it is better to adjust the box sides if there is a problem with the how the box and lid mate.  I used the shooting board to get a tight fit at the ends at this point:

All is now shaped and final smoothed, the bottom was fit and rabbets cut in the sides to capture it. I am finishing the cherry with garnet shellac wiped on.  Just a wash coat will go on the interior surfaces prior to glue-up.

The box has been glued up.  I favor old fashioned white (PVA) glue for dovetails as it is slippery, helping the joints go together easier, and has a longer open time than most yellow glues. The joints are tapped together with the aid of a padded block and a wedge :

I cleaned up the joints with a hand plane and finished the exterior of the box.  After final sizing the lid I glue on battens which are located with pins (bamboo skewers).  The battens stabilize the lid and act as locators properly aligning the lid to the box:

Next I routed mortices in the lid and the handle blank.  I used a rhododendron branch that I found as driftwood in the river near by, shaping it with small spokeshaves:

After smoothing the handle and finishing with shellac, I attached it to the box with a slip tenon and the box was complete:

Now, two more boxes to make for another client who ordered one for herself and one for a friend. Once those are done I’ll get back to that guitar and more posts.

Until next time.

df

Posted in Movie Box | 11 Comments

Back to the Movies

A few posts back I mentioned that the last thing I had to do with the movies was with Nights in Rodanthe. That movie, starring Richard Gere and Diane Lane, came out about 4 years ago.  Ms. Lane is portrayed as a woodworker who in her past built a small rustic box of driftwood. In the movie she makes another more elegant box.  Well, I was contracted to build both boxes, provide some of my tools for props, train Ms. Lane to look believable while planing, sawing and doing other woodworker things, and provide a sequence of materials so she could appear to do some hand cut dovetails.  For that alone you gotta love this movie! That was all fun and good, but unfortunately I was not credited for my part in the production — so much for fame and fortune in the movie industry.  Well, it turns out, in this day and age of the internet and search capabilities, it is relatively easy for folks that want to find the maker of the driftwood box featured in Nights of Rodanthe to do so anyhow.  This week I have three of them to make in time for holiday gifts.  I have other work on my bench (like acoustic guitar number 26!) but these orders all just came in recently and they are not too time consuming to build, so I am slipping them in to my work schedule. The boxes actually play a pivotal role in the movie where they have both a romantic twist and a keepsake aspect to them. It’s easy to understand why people feel a connection and want to manifest that.

The original boxes were made of cypress, which I found out I am quite allergic to in the process of working with the wood. Henceforth I have made reproductions using other types of driftwood or salvaged wood that I have fished out of nearby Watauga river.  Half the fun of making these boxes is going out hunting for the materials.  I’ll be making these commissioned boxes from a pretty nifty log of cherry I pulled out of the river about a year ago: The stuff is nicely weathered, but still quite sound inside. One nice thing about the cypress was that the wood is so rot-resistant that it could weather quite deeply yet remain sound for doing the dovetailed joinery. It’s a challenge finding other woods that are nicely weathered without being rotted as well.


Here I’ve used a pair of wedges to create a flat face so I can now band saw what I need from the log. I’ve had my eye out for a froe to make this kind of splitting more convenient, for quite some time, but have yet to come across one, or to simply make one. Laziness.


The 14″ log is up on my saw.  I’ll bandsaw free-hand along the layout line that’s visible and then set up with a fence to saw the rest.


Most of the wood is cut up.  The three slabs will become the ends of the boxes. This wood is amazingly dry for coming right out of a log, but the stuff must have dried for some time as a snag in the river and then its been in my shop for a while now too.  It all stayed dead-flat coming of the saw, but I’ll be letting it settle for a while.  From here on I will just be building one box at a time.  The dimensions will all be slightly different box to box as I respond to what I have to work with, and this isn’t a cookie-cutter type object so I like being able to concentrate on each box as it takes shape.

Until next time,
df

Posted in Movie Box | 2 Comments

Keynote

There are precious few sources for truly well-crafted furniture hardware that I am aware of.  The Brusso line has been around for a good while now and they do a nice job with their knife hinges.  However, if you want to hang a wall cabinet with keyhole type hangers or put a lock on a cabinet or box, elegant options seem to be limited or non-existent. While it is possible to polish up available lock-sets and do a bit of judicious modifying to make them presentable, the key is another matter. Usually the keys are made from plated pot metal which makes them difficult or impossible to modify.  Here’s a typical example:
You can see that the surface finish is mediocre and that casting seams are apparent.  The design of the key is also only suitable for certain styles of work.  If you try to polish this, you’ll quickly go through the plating, reshaping will have the same effect, and attempting to solder on more metal  will only melt the pot metal.

Recently a client requested a lock be retro-fitted to one of my Wall-Mounted Jewelry Cabinets (click here for an example) that her husband had purchased the year before as a gift. Installing the lock on the finished cabinet was stressful enough, but then, once again, I was faced with an unhappy choice of keys for the lock, as above. In the past I had been able to modify the key supplied with the lock and end up with something reasonable, but that was not going to be possible this time around.  I decided to make one from scratch as the functional part of the key was so simple.

First I chucked some 1/8″ brass rod into my drill press, lowered it down into a vise (which was clamped securely to the drill press table), grabbed a hold of it in the vise and then loosened the chuck. Now I was able to drill the necessary centered hole in what would become the end of the key shaft. I started with a very small bit and worked my way up using four successive bit sizes to the ending diameter.  Next I silver-soldered a tab of brass to the end of the key shaft.  The mating surface of the tab was arced to conform to the shaft using an 1/8″ round file. Then I made a wooden knob drilled for a snug slip fit to the shaft, positioned it and drilled for a fixing pin made from a brass brad:
The resultant key is much more suitable and my client was very pleased with the result. Sadly, that is not the end of the story.  A few weeks later, I hear back that the tab of the key has broken off in the lock! Well, I’m no metal-smith and this experience certainly proved that.  Luckily a world-class metal-smith lives and works right across the river from me, my friend Mark Read. I went to Mark for some trouble-shooting. First, he determined that I did not use silver-solder — the remaining film of solder was much too soft for that.  Then I got a nice little lesson in quality silver soldering. I’m very confident that Mark’s work will stand up well to everyday use.

Until next time
df

Posted in Miscellany | 1 Comment

Guitar 26 – 4th installment

Some preliminary shaping with plane, spokeshave, and chisel after gluing  a few braces to the top.  The pattern is based on the standard Martin-style configuration.
The last of the braces is glued on.  The hole in the brace provides access to the truss rod adjusting nut:

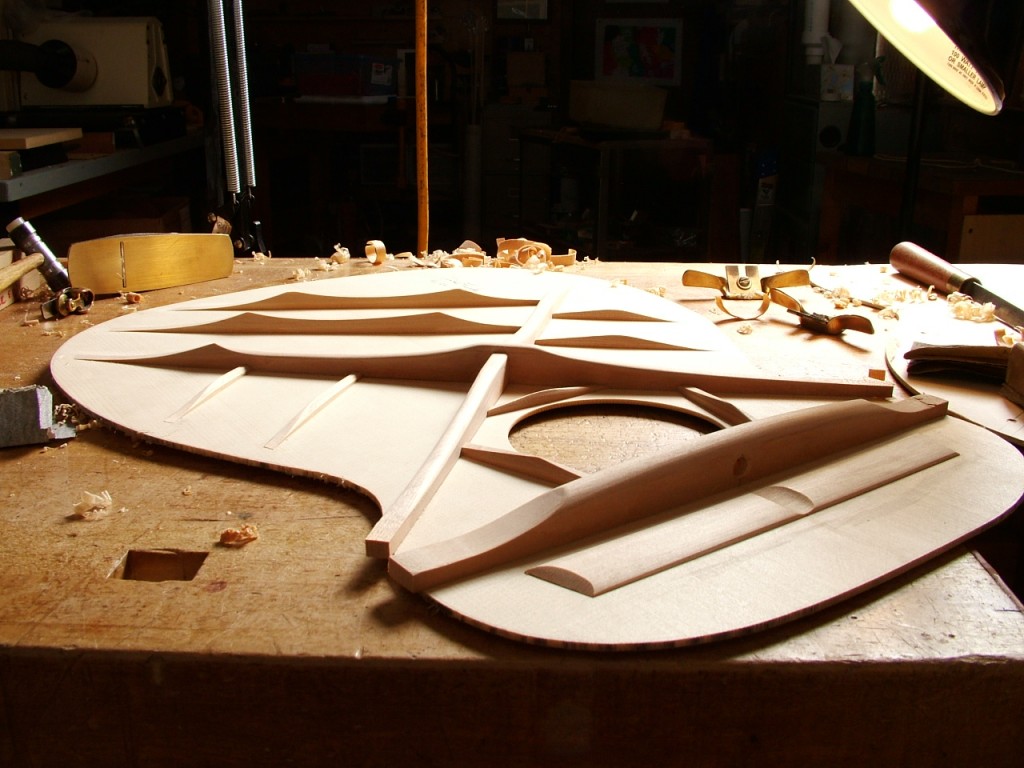
Brace carving in progress:
Brace carving completed:

Until next time

DF

Posted in Guitars | Leave a comment