 Welcome to the opening post of this blog about my activities as a fine woodworker. I’ve been building a wide array of fine furniture, lighting, and guitars since gaining my woodworking education in 1984. I am excited about sharing this information and hope I am up to the task of posting on a regular basis. If history provides any insight, then you should see a wide variety of projects unfolding in the future as reflected by the work seen on my web site: could be a rendition of a little box like I made for the movie “Nights in Rodanthe”, a hall table, or a church alter. I’ll be chronicling the day-to-day progress of whatever I am working on at the moment, though occasionally I may back-track a bit and offer up some photos and comments from past work or take a side journey to a topic of interest. I intend to approach this honestly, sharing the everyday, my best moments, and the lousy ones too. My mentor used to say that yes, we learn from our mistakes, but we learn just as well, maybe even better, by getting things right. Rather than arrogance, this was simply an exhortation to think things through – words to live by.
My aims with this blog are two-fold. First, I am deeply indebted to the taxpayers of California who funded a community college – the College of the Redwoods — which was wise enough to establish a fine woodworking program headed by James Krenov back in the early 1980’s when the opportunity arose. My two years of study there were tuition-free, but not without obligations. I have been dedicated to sharing what I learned there ever since graduating in 1986. In the past that’s been through teaching and the writing of my book “Making and Mastering Wood Planes”. Blogging offers the opportunity to share this unique knowledge further afield and perhaps in a more intimate manner than is possible in a class or workshop setting. The second reason cannot be labeled altruistic: I am hoping that some people who read this blog will be intrigued with what I am doing. Such a person may want to study with me, purchase a book, or possibly, buy one of my pieces. In my mind it makes a nice circle – do the work, share the knowledge, sell the work, repeat.
Right now I am working on a steel-string guitar. I’ve built 26 guitars over the past 28 years. My first guitar, a nylon-strung classical was made over a summer while I was enrolled as a student at UC Berkeley. My passion for fine woodworking was fired by that experience and my life’s path was altered. I knew I’d found what I wanted to do. As you might expect, that guitar wasn’t so great, but it was on the strength of that effort that I was admitted into the CR Fine Woodworking Program.
So, onto guitar-making. Recently a musician in the Johnson City area of Tennessee took a liking to the guitar I made and have been playing for several years. It’s a dreadnought pattern based on the highly sought after pre-war Martin HD-28. I agreed to let it go, but first I need a replacement. I play rhythm guitar for my daughter’s Celtic band, The Forget-Me-Nots and it would not do to be guitar-less. I’ll be making an OM style body for my new guitar. The last couple of guitars I made were this type and I really like them for what I do.
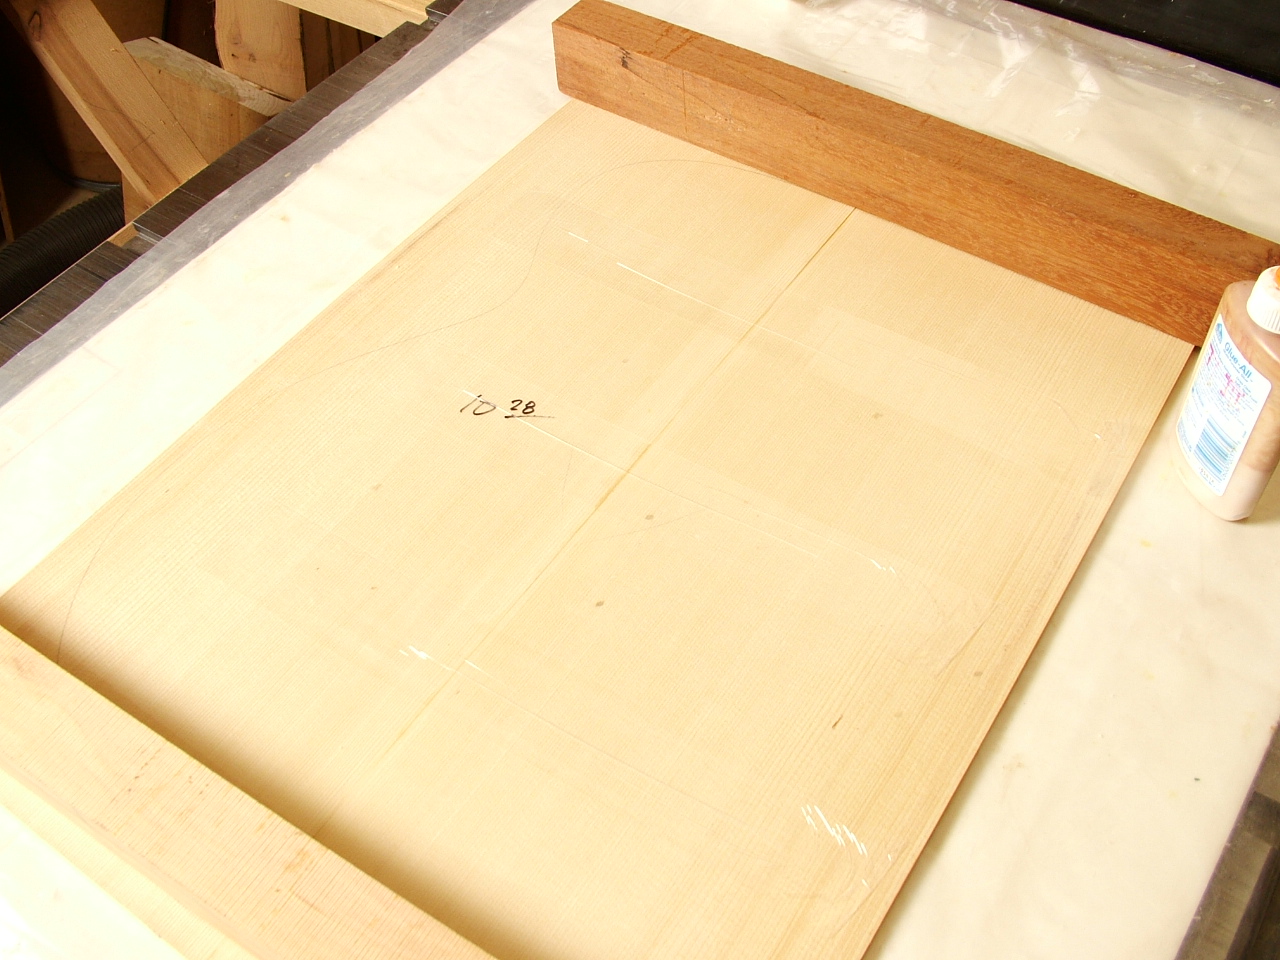
Here’s my glue-up of the Engelmann spruce top:

The joint is perfected with a hand-plane and shooting board then clamped using packing tape stretched across the joint every 2” or so. The ends are weighted down to prevent them from flapping up. There’s plastic underneath and the time is noted. I used Titebond III for this joint, which was a foolish mistake – its dark coloring makes even a good joint apparent with light colored wood. Got to stay on the ball! The shooting board and plane:
 And here’s the Macassar ebony back after glue up. It was joined in the same way but with wings added because my stock was just as bit too narrow to accommodate the back width.
 The stock for the sides is nice stuff, but obviously comes from another tree. Thankfully the contrast is actually not as great as appears in this picture. Assembly and finishing will also help merge the two more harmoniously
 After thickness sanding the sides, both are clamped together on my workbench and I cabinet scrape them close to their final finish and thickness prior to bending. You can see from the shaving that the ebony scrapes beautifully. The latex coated gloves give a good grip on the scraper and protect fingers from the heat generated – you can blister your fingertips if not careful! The gloves also keep my hands clean as ebony dust really blackens them.
 With the sides thicknessed I use a router template to trim them to approximate shape and then bend them. Here I am using a Watlow silicon rubber heat blanket and an internal form to do the bending. I soaked the side in hot water for 10 minutes then laid the side on the form and the heat blanket on the side cranked full on. The shaped waist block was brought down onto the form when I could feel the side becoming pliable, then secured with the clamp. Then I smoothed the ends down onto the form with the aid of the wood blocks and clamped them in place. With the heat blanket temperature lowered, I dried out the side and set the bend for 10 minutes before shutting the blanket off and letting everything cool down.
 Here’s the bend after one hour of cooling – an excellent result,. very minor spring-back:
 The form is covered with reflective aluminum duct tape. Now on to the other side and then scrape the back to final thickness after thickness sanding.
 The ends of the bent sides are trimmed and fit into the mold:
 See you next time.
df


